

"This is the beginning of a beautiful .."
(Casablanca; 1942)
 I remember making such bracelets on a summer camp (I was 11 then) as they became very popular among the girls, including me. We made a great team so we traded them with each other and in the end I came back home with dozens of such bracelets.
Today’s tutorial is made for a special request from a ten-year-old Iza, who recently became interested in making Filofun bracelets. She also liked my embroidery floss bracelet I never take off and she wanted to know how to make one. Due to lack of time to show it to her personally, I decided to make a tutorial here. The pattern is not complicated and it is only one of hundreds of possibilities of weaving.
difficulty: easy
estimated time: 20-30 minutes
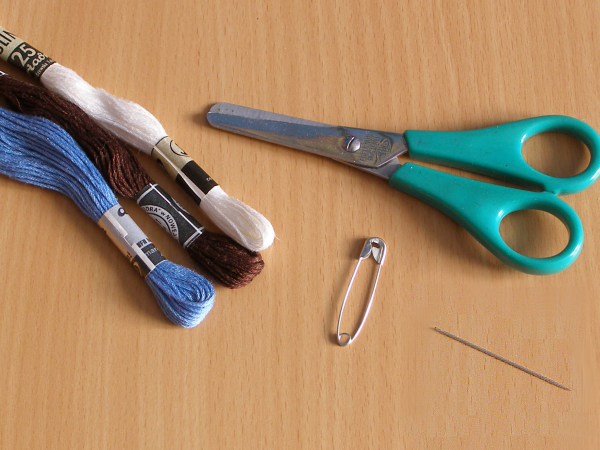 You will need:
- scissors
- colorful embroidery floss (I usually use three colors, cause more is too much for me – here I chose the colors of my blog – white, brown and blue ^^)
- safety pin
- needle
Tutorial steps:

1. From each color of embroidery floss cut off a few pieces long as from your hand to shoulder. I cut off 3 pieces of white, 3 blue and 2 brown. The more threads, the thicker the bracelet will be (and also require more work). With the length of the threads shown here, you can make a bracelet of max. 10 threads – if you want more, they have to be longer.
2. Take the threads together and tie them making the strong knot at the end. Then, put the safety pin through the knot.

3. Fasten the pin to a pillow, a seatback or your trousers and separate
each color (their order will represent the order of the colors on the
bracelet).
4. Now watch the short video on the rest of tutorial. I decided to make it like this because the photos I made could be unclear and hard to describe. And in the video you can see all moves. There is no sound in it, so it won’t be annoying. A part of the bracelet is already done there but the beginning does not differ from what’s shown in the video. .
5. Make as many rows this way as will fit on your wrist..

6. Make a knot at the end and cut off the unused threads.
7. If you want to tie the bracelet on somebody’s wrist, take a short piece of the embroidery floss and thread the needle. Put the needle through both of the knots. Leave one end of the thread on the one side and one on the other side and take off the needle. Tie it and that’s it.
Downloadables:
- Printable version (pdf)Downloadables:

Next week: Daisy Dukes with Dixie Flag
No comments:
Post a Comment